Quickstart
This guide walks you through your first session in Kilo Desktop. If you haven't installed the app yet, see Installation.
Complete onboarding
On first launch, a short setup wizard walks you through the setup steps.
1. Review the terms of service
Review and accept Kilo's terms of service. You need to accept them before you can use the app.
2. Connect to Kilo
Sign in to your Kilo account to use frontier models, credits, and organization settings through the Kilo Gateway. You can skip this step and connect later from Settings.
A Kilo account is also required to use conda environments, the local model server, and notebooks. You can sign in during onboarding or later from the Account section in Settings.
3. Choose an autonomy level
Choose whether you want Kilo to operate with high autonomy or review its work first, pausing to show its plan and ask for your approval before it edits files or runs commands. High autonomy is the default behavior of the Kilo Code agent.
4. Create a workspace
A workspace scopes a session to one or more folders on your machine. Add the folder(s) you want the agent to work in; the agent's file access, terminal, and git operations all run inside the workspace. You can add more workspaces anytime.
5. See what you can do
A short tour of Kilo Desktop's features finishes setup.
Navigate the home screen
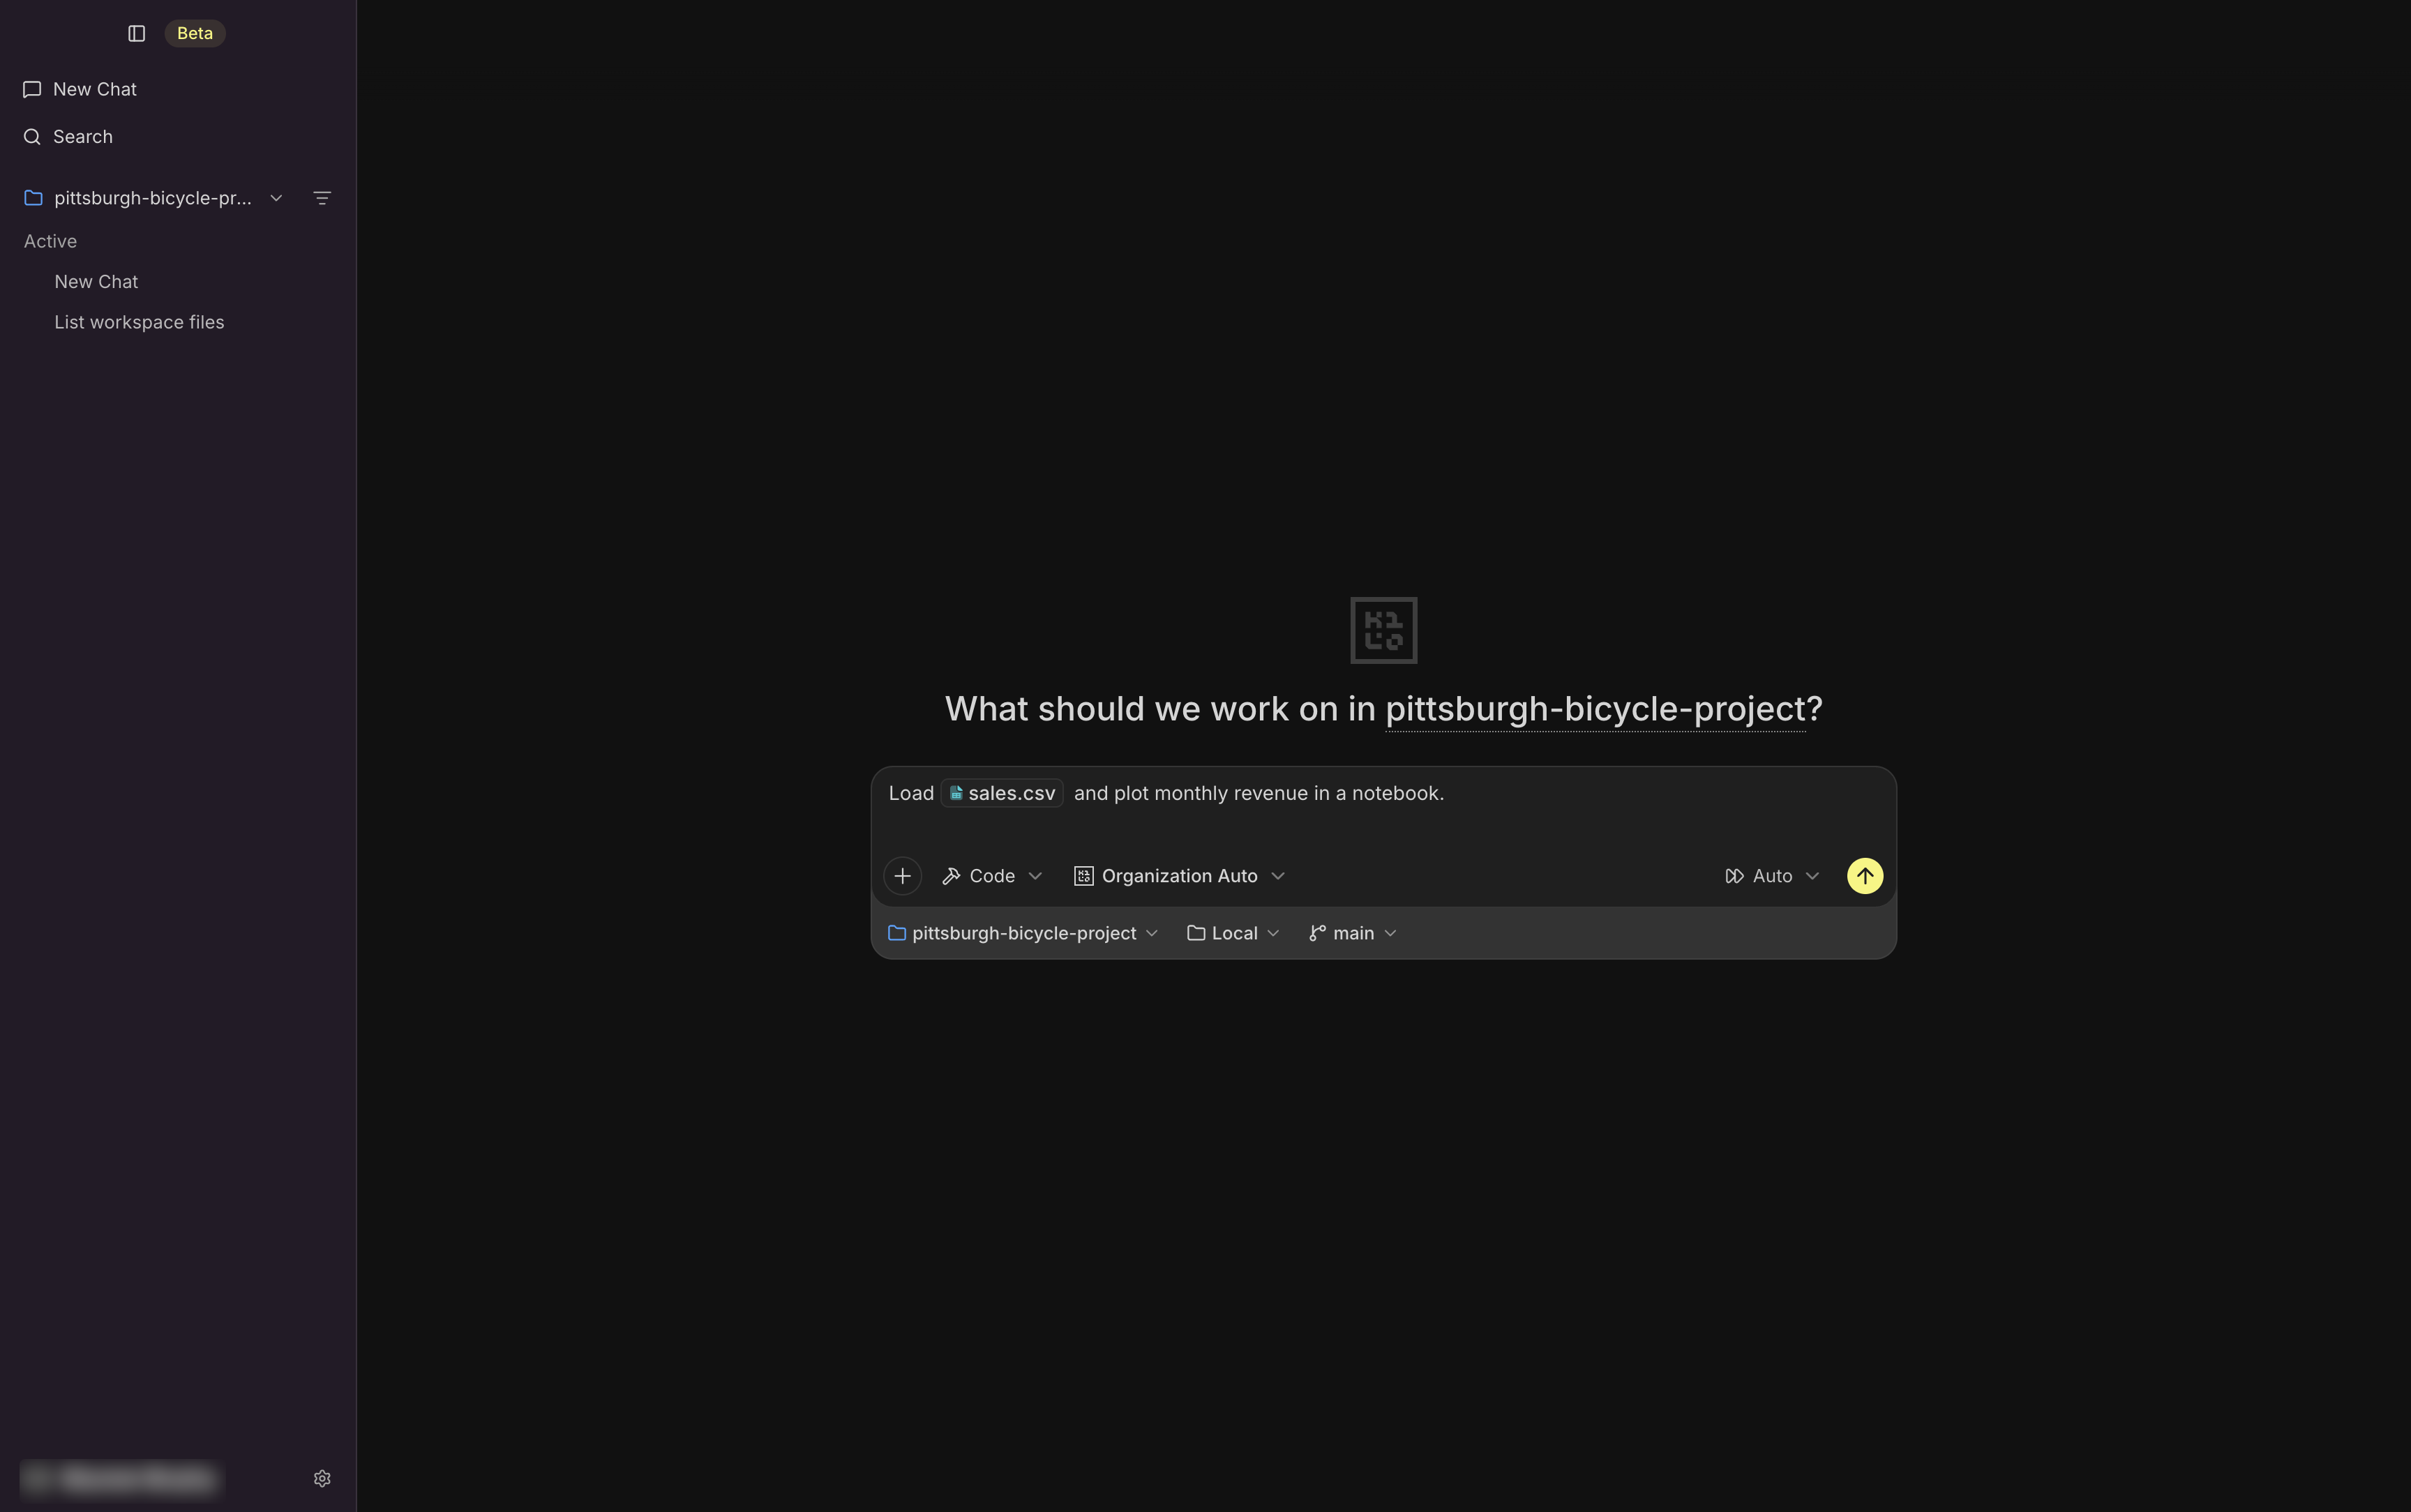
When Kilo Desktop opens, you land on a new session in the workspace you created during setup.
Sidebar
The sidebar on the left manages your sessions and workspaces.
New session starts a fresh conversation.
Search (⌘K / Ctrl+Shift+K) finds past sessions and workspaces.
Workspace filter — choose All workspaces, No workspace (sessions that aren't in a workspace), or a single workspace. You can also create a New workspace here.
Session list options — organize the list:
- Grouping: Status, Workspace, or Updated.
- Ordering: Updated or Title.
- Show: choose what each row shows (Workspace, Updated, PR).
- Filters: by Status (All, Needs attention, Working, Idle, Archived) or by Pull request (All, Any PR, Open PR).
Collapse All / Expand All and Reset view are in the same menu.
Manage sessions
Hover a session to Archive or Pin it. The … (More) menu also has Rename and Delete.
- Pin keeps a session in the Pinned group at the top of the list. Shift+click a session, or press ⌥⌘P (macOS) / Ctrl+Shift+P (Windows/Linux), to pin or unpin it.
- Archive moves an idle session into the Archived group. Archiving can't be undone.
- Delete asks you to confirm (Delete this session?). It permanently removes the session and its history. If the session is the last one using a worktree, you can choose Keep worktree or Delete both. Deleting the worktree loses its uncommitted changes and unpushed commits.
Settings
Access the app settings by clicking the settings icon at the bottom of the sidebar. See General settings and AI settings for details.
Chat with the agent
The rest of the window is where you chat with the agent. Type a message, use @ to mention workspace files, or / to run a command.
Input controls
The controls around the input let you:
- Add an attachment with the + button.
- Choose an agent to set how it approaches your request. Pick one of the default agents: Code, Plan, Ask, Debug, or Architect. See Using agents for what each one does.
- Select autonomy level for the agent. With Manually approve, Kilo asks before each file edit or command; with Automatically approve, it proceeds on its own without requesting permission.
- Pick a model for the chat. The available models depend on how you're signed in and which providers you've connected. The list can include Kilo Gateway models, provider models you've added, or a local model you've added. The picker labels free models Free and models that use your own API key BYOK. Use the filter to show only free models. Free models may use your data for training; see Privacy.
- Select a workspace to scope the session to a workspace, add a New workspace, or choose No workspace to chat without one.
- Set where changes go with the git controls beside the workspace — work in your Local repository (switching or creating branches as needed), or run the session in a new worktree, an isolated copy created from a base branch. See Git integration.
Send your first message
Enter your message and send it to start the conversation. See What you can ask for prompts to get you started.
While the agent is working, you can keep typing and select Queue (or press Enter) to line up your next message. Queued messages appear above the input and are sent one at a time when the agent finishes. Select Send now to send one immediately, or delete it. Stop generating pauses the queue.
Review a plan
When the Plan (or Architect) agent writes a plan, a plan card appears in the chat with a preview. Select View Plan to read the full plan in a Plan tab beside the chat, then Approve it to let the agent start work. To change the plan, type your feedback and select Refine. Each revision gets its own card, and an open Plan tab switches to the newest revision once it's ready.
Keyboard shortcuts
Press ⌘/ (Ctrl+/) to see all keyboard shortcuts. You can change them in General settings.
Work in tab groups
Tab groups let you work in the same workspace alongside the chat. Each tab group holds one or more tabs. Send a message to access the tab groups view.
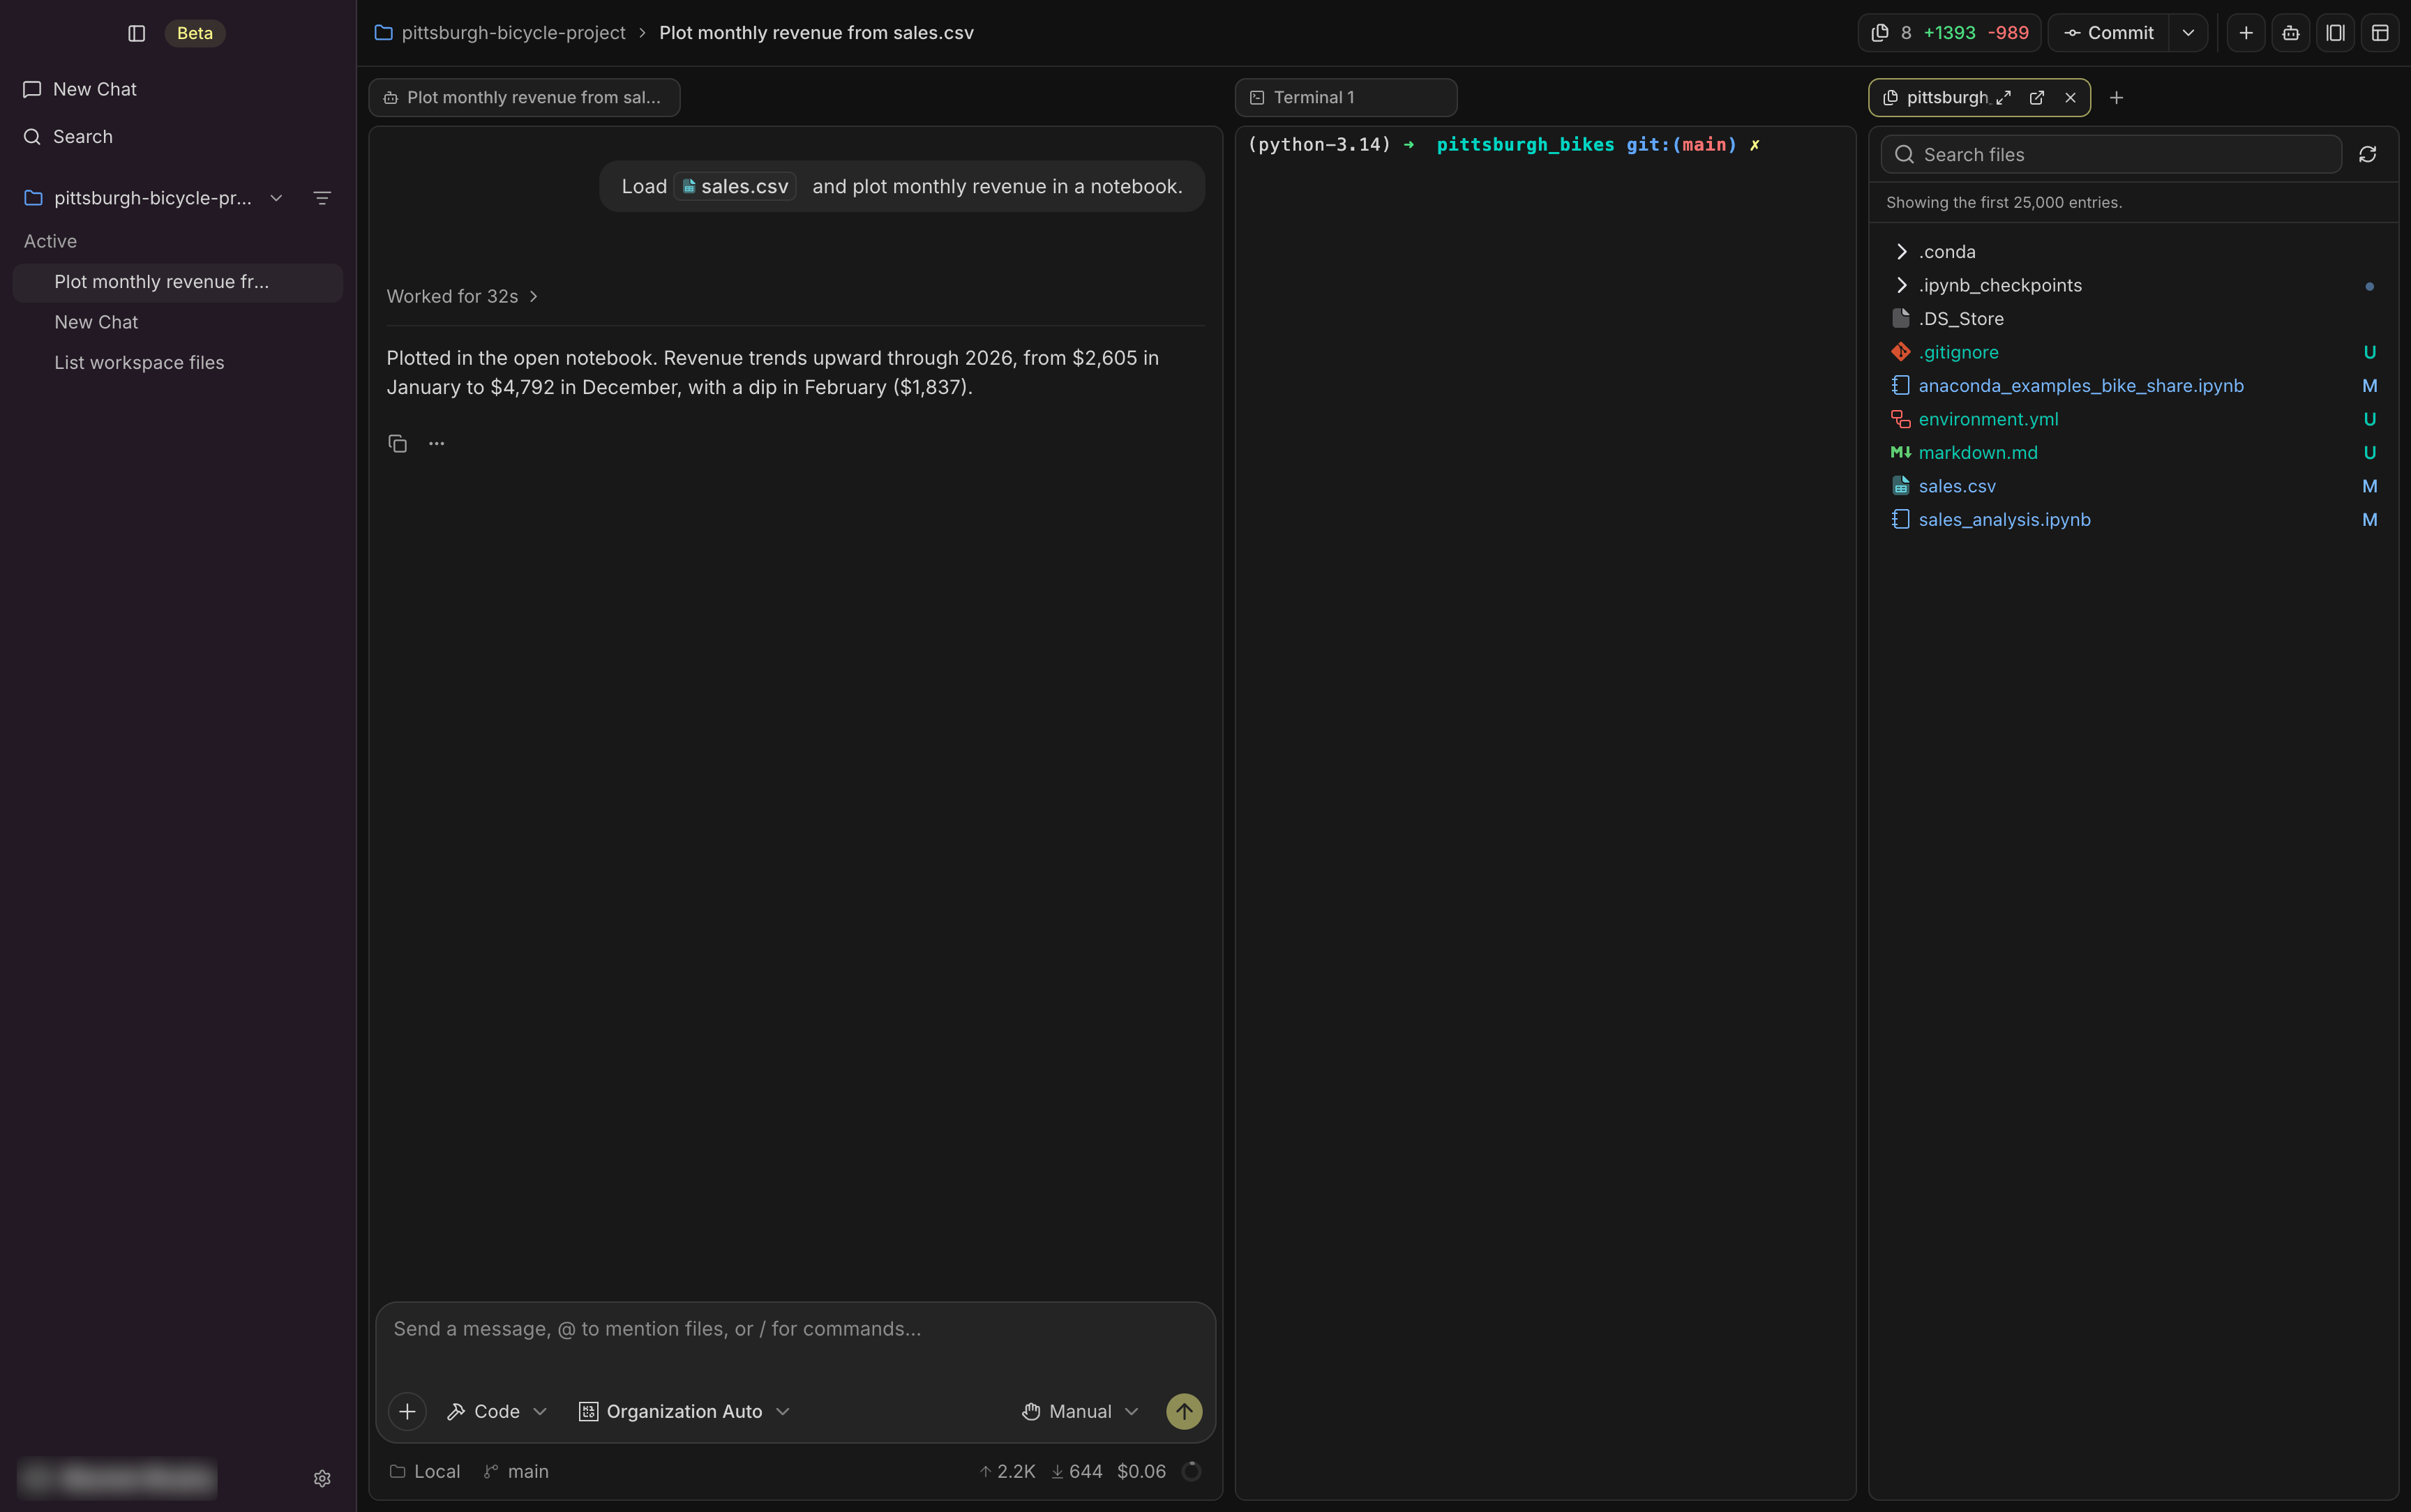
Open a tab group
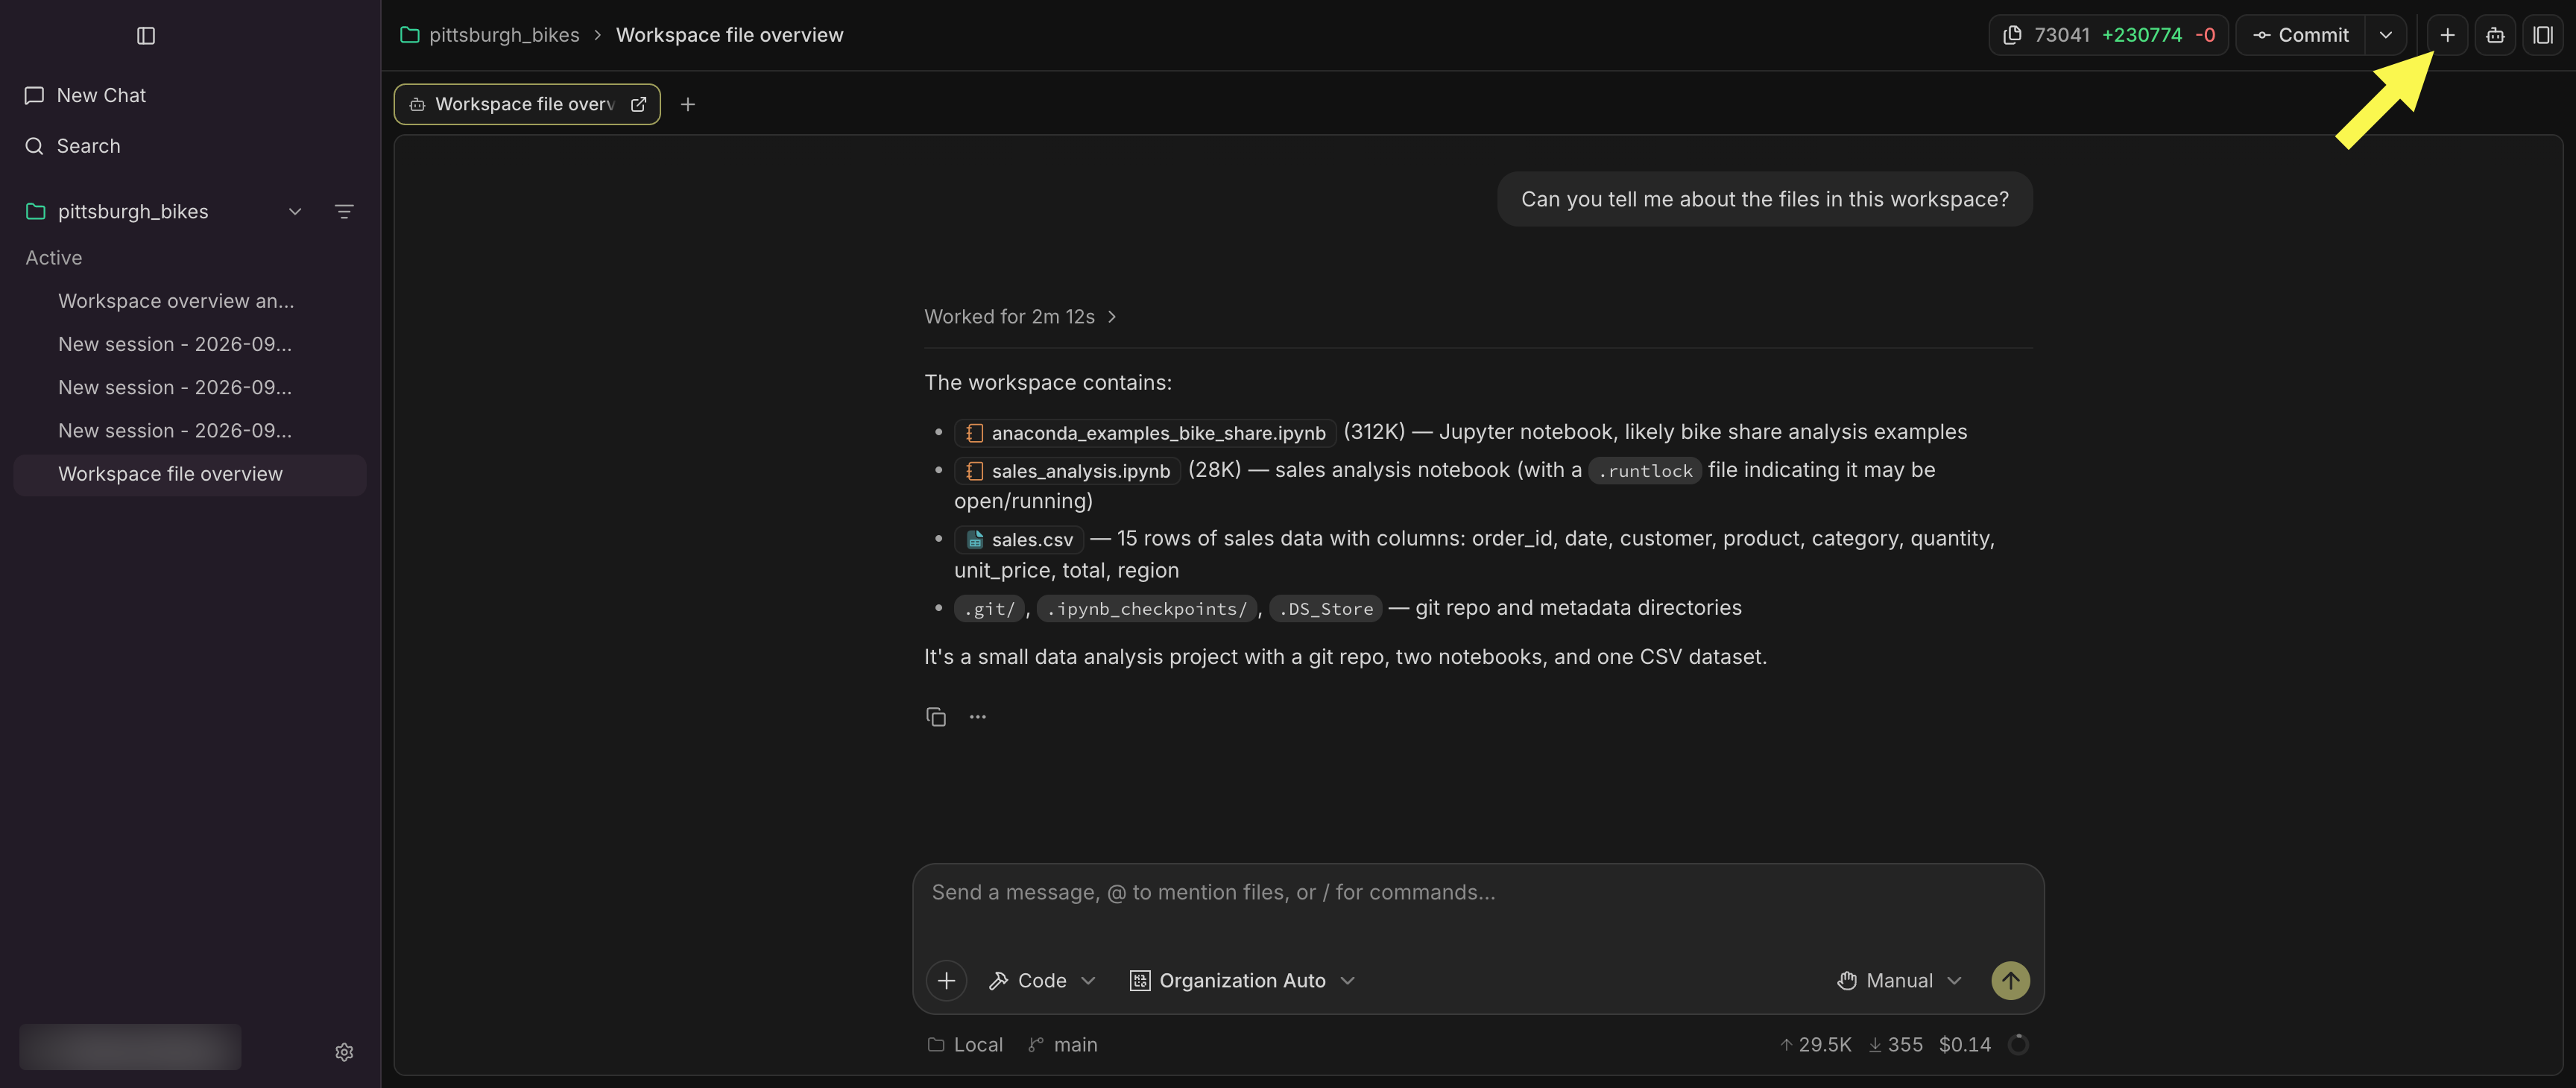
Open a new tab group with the + Add tab group button at the top of a chat:
Then, pick a tab to open in it:
- Files — browse and edit files in the workspace.
- Changes — review uncommitted git changes.
- Notebook — analyze data in an interactive Python notebook. Requires a Kilo account; the entry stays grayed out until you sign in.
- Browser — open web pages without leaving the app.
- Terminal — run commands in an interactive shell.
Arrange tabs and tab groups
Use Add tab beside a tab group's tabs to add another tab to that group. Drag a tab to move it to another tab group. To move a whole tab group, drag it from the empty space to the right of its tabs.
Each tab has its own controls: Expand grows the tab to fill the workspace (select it again to collapse), Pop out moves the tab into its own window, and the close button removes it.
By default, each tab group you open is added next to the others, and the tab groups get narrower to fit your screen as you open more. Turn on Carousel layout to keep the tab groups wider, then hold Shift and scroll with your mouse to pan across them.
Show chat jumps you back to your conversation tab.
Save and reuse layouts
When you find an arrangement of tab groups and tabs you like, save it as a layout and reuse it in other sessions. A layout stores how your tab groups and tabs are arranged, not their contents — your chat history and the files, notebooks, or pages you had open aren't included.
Use the Layouts button at the top right of a session to:
- Save current layout — name the arrangement and, optionally, Use as default for new sessions. The dialog lists any open tabs it can't recreate in a new session (such as a specific file, notebook, or browser page).
- Apply a layout — select a saved layout from the menu to rearrange the current session to match.
- Manage layouts — set or clear the default, update a layout from the current arrangement, rename it, or delete it.
The default layout applies to new sessions only; existing sessions stay as they are.